Chrome Extension
The SnippKit Chrome Extension allows you to capture, organize, and sync code snippets directly from any web page into your SnippKit library with a single click.
Whether you find a working solution on StackOverflow, documentation sites, or GitHub, the Chrome extension lets you save code without switching tabs or breaking your browsing flow.
Overview
Context switching between web research and your code library slows down development.
The SnippKit Chrome extension adds a context menu shortcut ("Save to Snippkit") directly to your right-click browser menu, enabling instant code capture with language detection and tag assignment.
Direct App Shortcut
Manage your connected browser extension tokens anytime at Settings → Extensions (
/settings/extensions) or view the extension feature page at /services/chrome-extension-feature.What you can do
With the SnippKit Chrome Extension, you can:
- Right-Click Code Capture: Highlight any text on a web page, right-click, and select Save to Snippkit.
- Auto-Detect Language: Automatically detect programming language from code syntax.
- Custom Slugs & Tags: Add custom short slugs, tags, and private notes directly inside the browser popup.
- Privacy Control: Save snippets as Private (only you) or Public (community discoverable).
- Instant Cloud Sync: Snippets sync immediately to your SnippKit workspace without refreshing pages.
Installation & Setup
Quick Links
- Extension Settings (
/settings/extensions) — View active extension connections. - Chrome Extension Service Overview (
/services/chrome-extension-feature) — Explore extension features.
Step-by-Step Installation
- Navigate to Settings → Extensions (
/settings/extensions). - Click Add to Browser (or visit the Chrome Web Store page).
- Once installed, click the SnippKit extension icon in your Chrome toolbar.
- Click Connect to link your SnippKit account.
How to capture code
Follow these steps to capture, configure, and manage code snippets from any website:
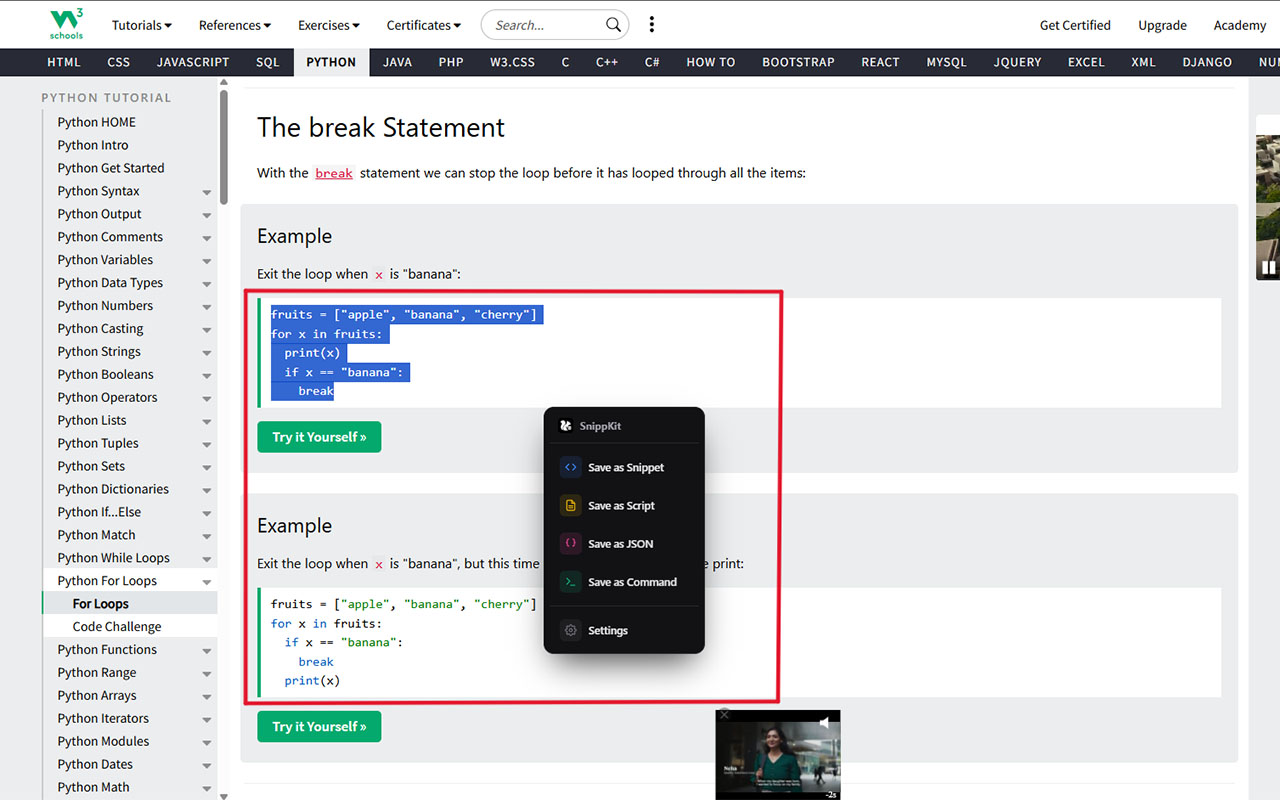
Step 1: Highlight Code & Right-Click
Highlight any code block, script, or JSON payload on a web page (e.g., StackOverflow, W3Schools, GitHub). Right-click and choose your target format from the SnippKit context menu (Save as Snippet, Save as Script, Save as JSON, or Save as Command).
Step 2: Configure in Extension Modal
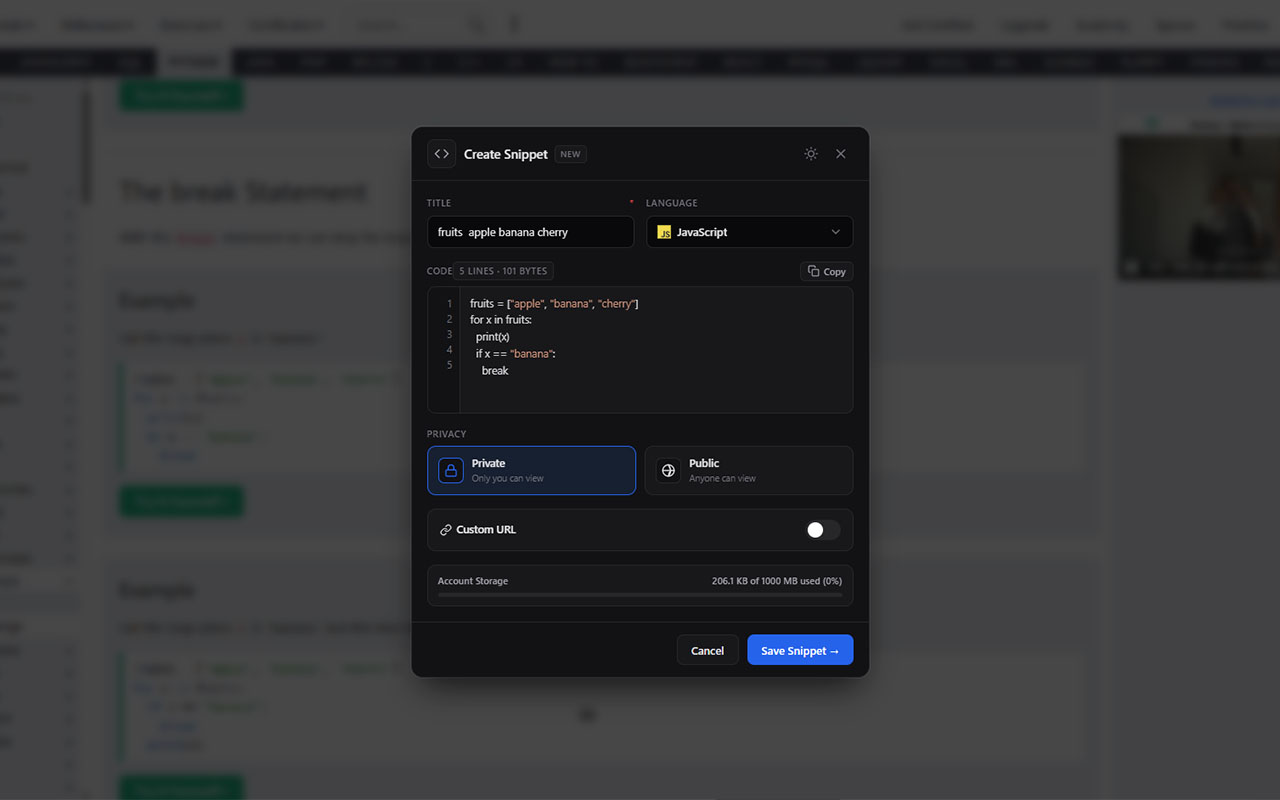
The extension popup automatically opens with auto-detected programming language syntax, line count, and byte size:
- Title: Enter a concise descriptive title for your snippet.
- Language: Verify or change the auto-detected language syntax.
- Privacy Controls: Select Private (only you) or Public (community discoverable).
- Custom URL: Toggle custom URL slugs (e.g.,
react-debounce-hook). - Account Storage: Monitor real-time account storage quota.
Step 3: Instant Cloud Confirmation
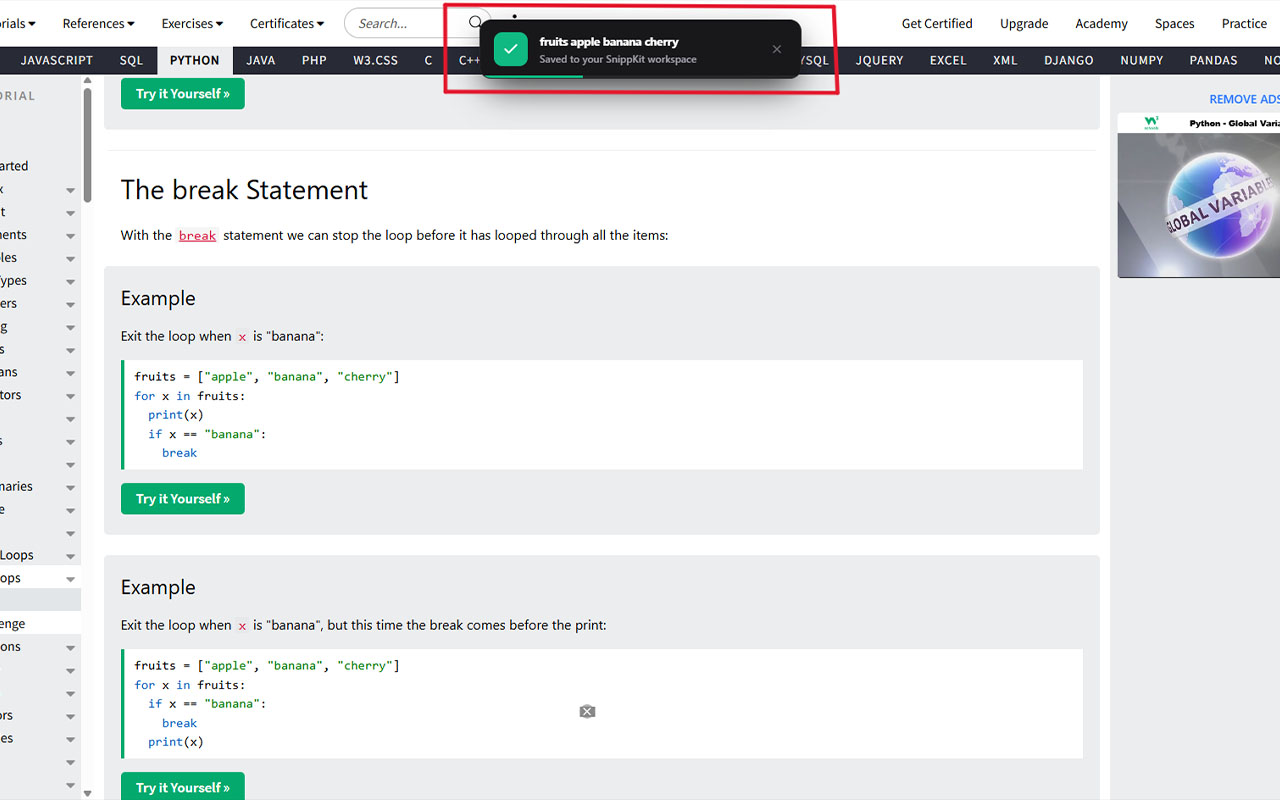
Click Save Snippet. A floating confirmation toast will appear at the top of your webpage confirming instant cloud sync without refreshing your page or interrupting your browsing flow.
Step 4: Cataloged in Workspace
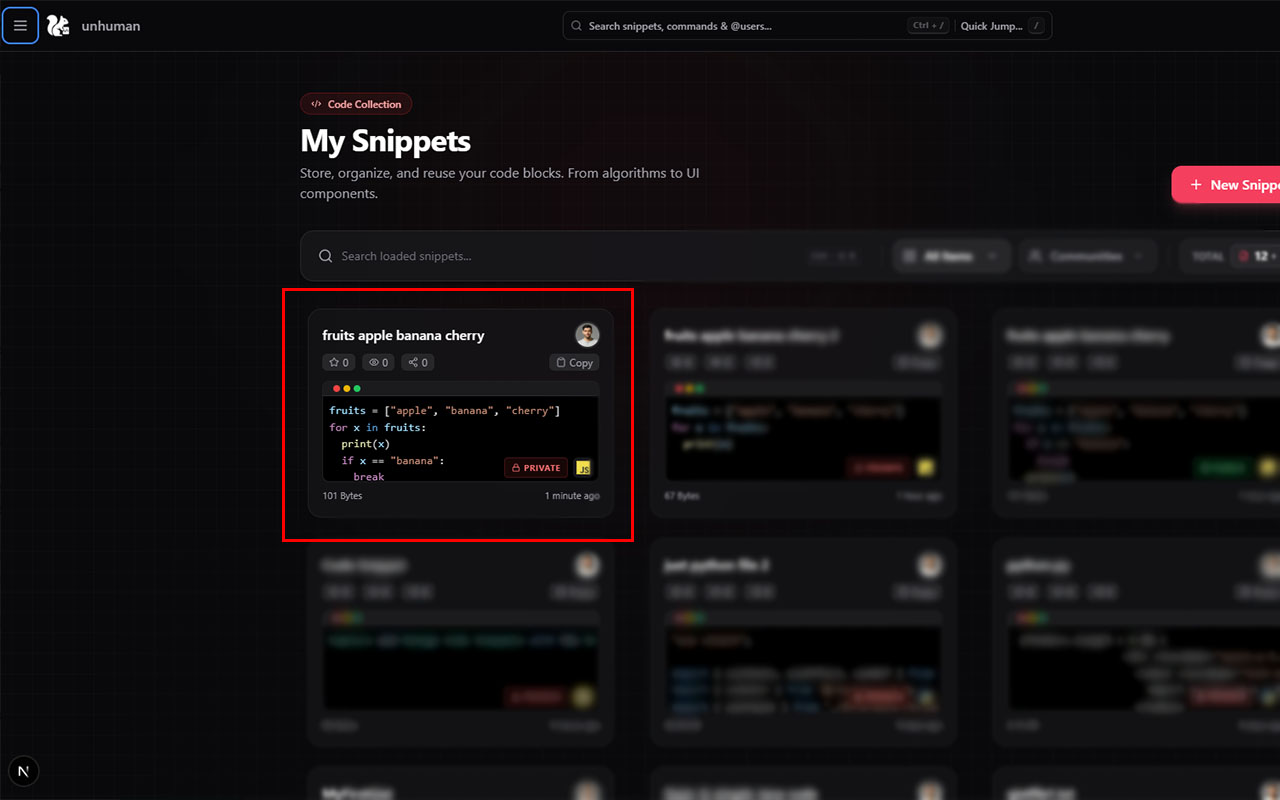
Your snippet is immediately organized under My Snippets in your SnippKit dashboard, complete with syntax highlighting cards, tags, line count, and byte stats.
Step 5: Manage, Edit, or Pull via CLI
Open the snippet to view full-screen code, copy to clipboard, share public links, make inline edits, or pull directly to your local terminal via
snix pull -s <id>.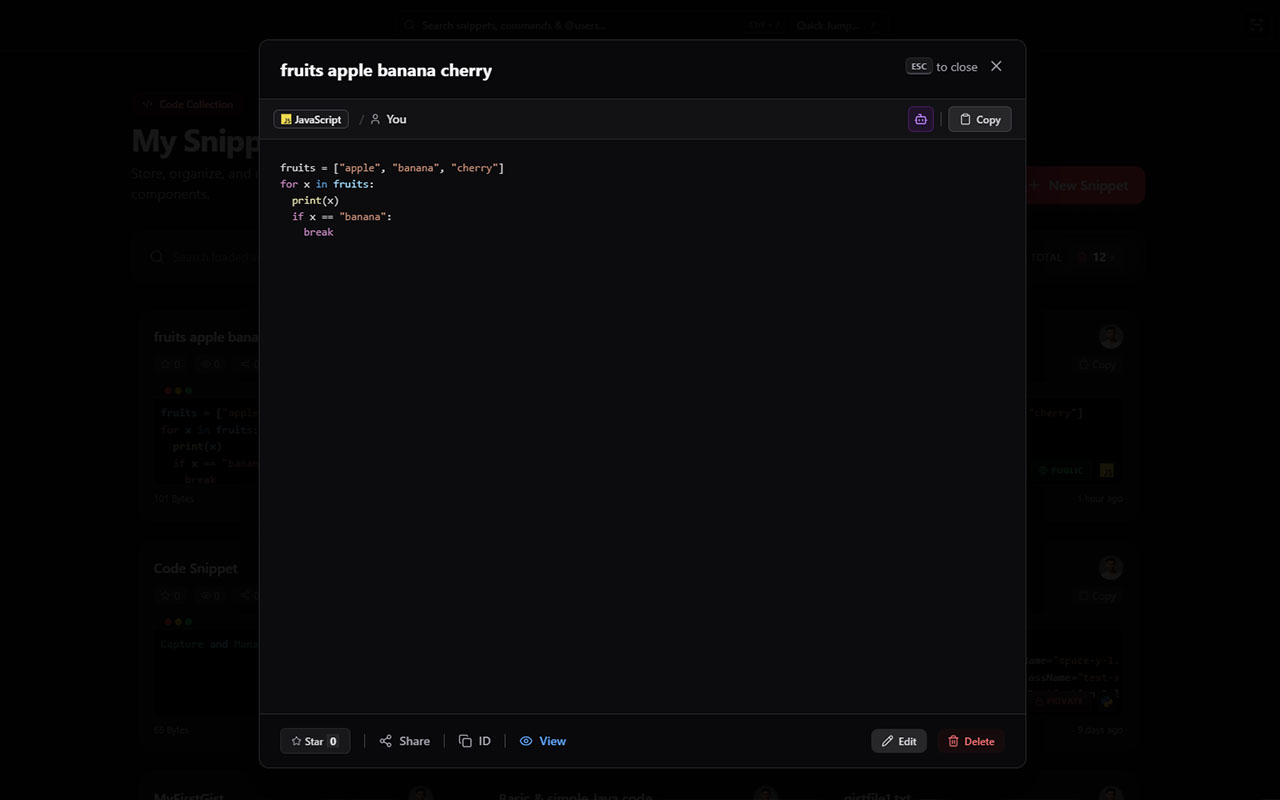
Step 6: In-Browser Extension Settings & Shortcuts
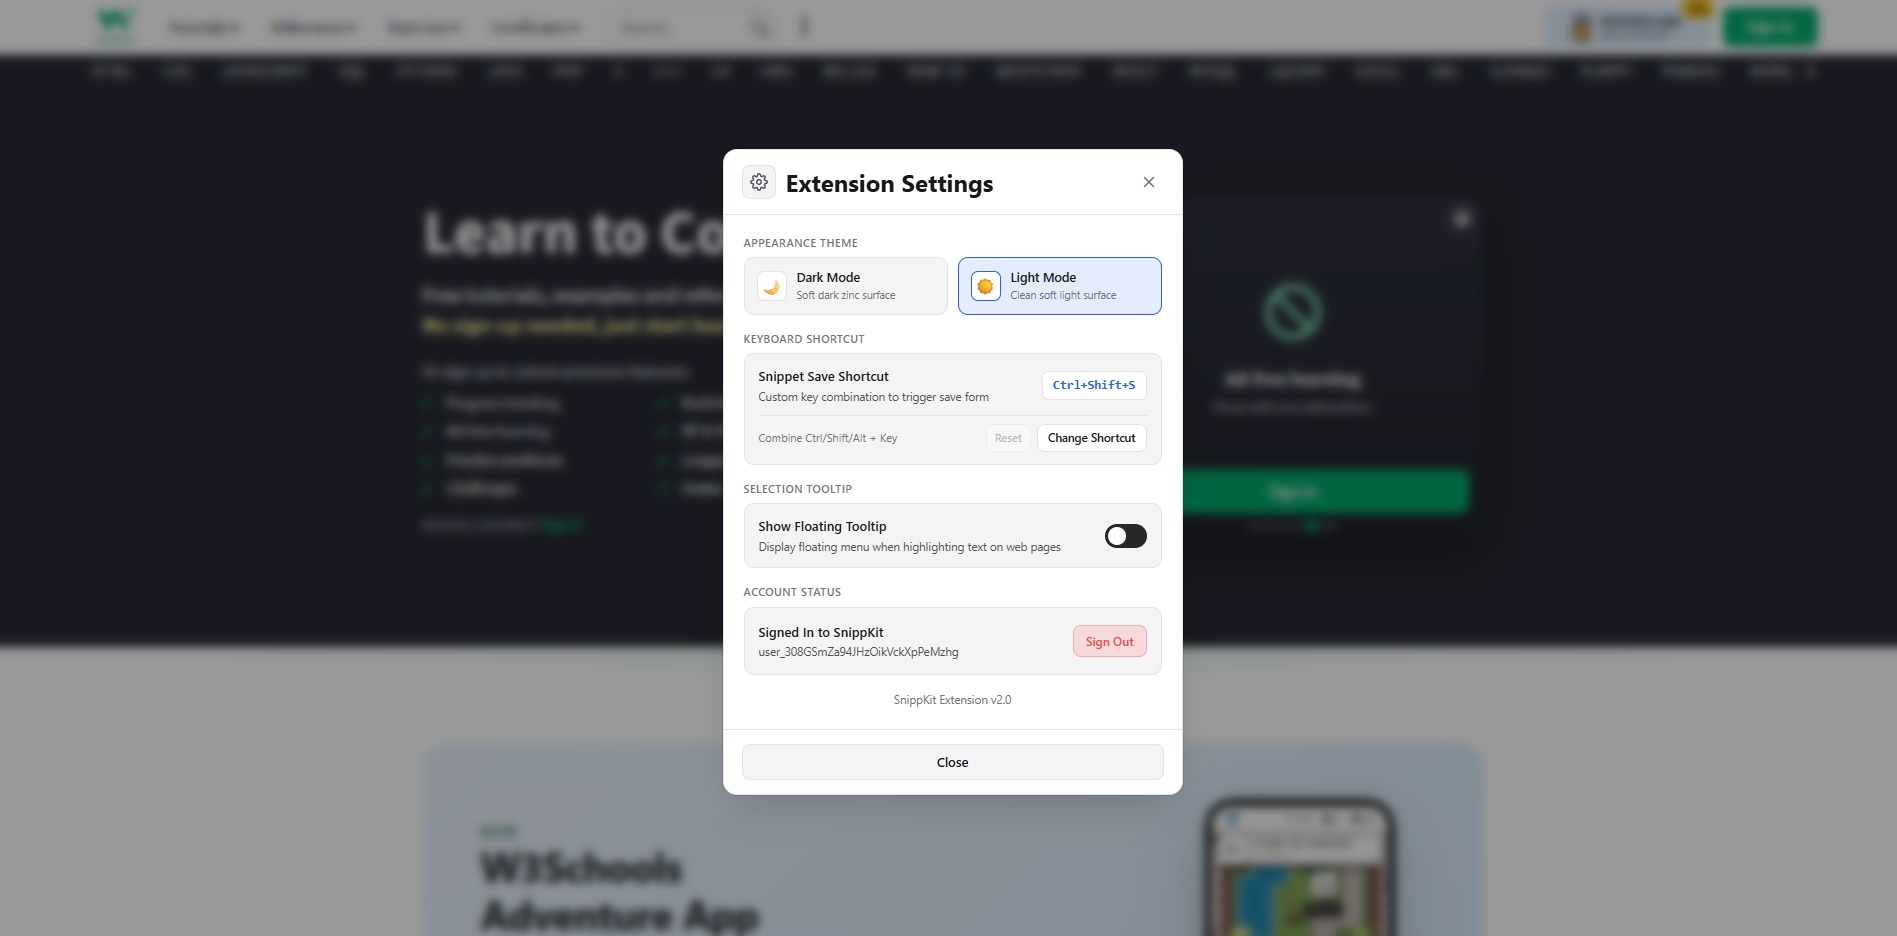
Click Settings directly from the context menu to open the extension settings modal without leaving your current tab:
- Appearance Theme: Choose between Dark Mode (soft dark zinc) and Light Mode (clean soft light surface).
- Custom Keyboard Shortcut: Customize the key combination used to trigger the save form (defaults to
Ctrl+Shift+S). - Floating Tooltip: Toggle whether to display a floating quick-menu whenever text is highlighted on any webpage.
- Account Status: Review connected SnippKit account credentials or sign out.
Custom Slug Rules
When assigning custom slugs inside the extension popup:
- Use hyphens to separate words (e.g.,
react-debounce-hook). - Allowed characters: Lowercase letters, numbers, and hyphens.
- Spaces & Special Characters: Slugs with spaces, underscores, or symbols will fail validation.
Managing Connected Browsers
- You can view and manage all connected browser extension sessions directly from your account's Extension Settings.
- Disconnect or revoke access to any browser instance at any time with one click.
Related documentation
- VSCode Extension — Save and insert snippets inside Visual Studio Code.
- Create Snippets — Learn how snippets are structured and validated.
- SNiX CLI — Manage snippets directly from your terminal.
- Security & Privacy — Manage active tokens and connected devices.
Copyright © 2026 SnippKitUp to date